Apple puree! (for 6 months old)

Hello everyone
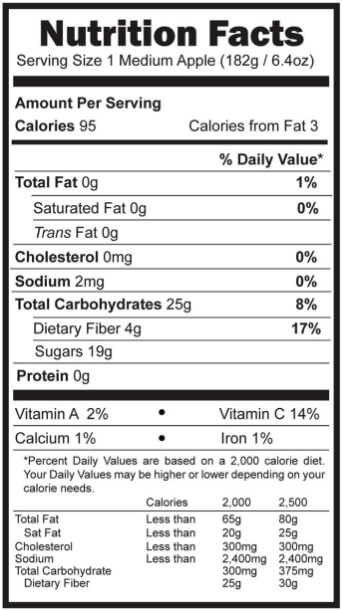
Apple is a good source of vitamin c and fibre. It is easy to digest and good for bone health.

POINTS TO BE CONSIDERED IN INTRODUCING SOLIDS

  • Till six months, baby is breastfed or formula fed. Whenever you start solid, you should start with breakfast or lunch.
  • Introduce only one food at a time and allow the baby to become familiar with the food for 2-3 days before trying to give another for.
  • If baby responds well and does not show any signs of allergy, then you can continue.
  • Give very small amount of any new food at the beginning, for eg- 1 tsp. Use a thin consistency when starting solid foods.

HOW TO FEED

  • Infants cannot eat large quantities of food in one sitting at a given time, so they should be fed small quantities.
  • Make sure your baby are fed seated, not laying down. Help your baby to sit in your lap if he/she cannot sit properly. If he/she can sit, must have a high chair.
  • Food should be of semi-solid for easy swallowing. Sometimes your baby tends to spit it out, this should not be mistaken as dislike for the food.
  • You should give semi-solid food every day for physiological maturity of swallowing.

FOODS TO AVOID (6-12 MONTHS)

  1. SALT: Don’t use salt, as baby’s kidneys are still developing. Salt can harm them. baby contains required sodium from breastmilk/ formula milk and other solid foods.
  2. SUGAR: Don’t add sugar because it could encourage a sweet tooth and lead to tooth decay when the first teeth start to come through.
  3. HONEY: Honey can contain a type of bacteria which can produce toxins in the baby’s intestines and can cause infant botulism. Don’t give it till your baby is one year old, even for easing cold.
  4. WHOLE NUTS: They are unsuitable for your baby under the age of 5 years because the risk of chocking. Use powdered nuts.
  5. FOODS WITH CHOCKING RISK: Jelly, gummy candies, hard candies, chewing gums, whole green peas, whole beans like chana or rajma, cough drops, popcorn, peanut butter etc. Remember to cut fruits like grapes cherry tomatoes into quarters before serving, and shred or cut meats and cheese into very small pieces.
  6. Egg whites and cow’s milk.

LET’S PROCEED TO THE RECIPE

INGREDIENTS

Apple: 1 (medium)
Water: 1 cup
Breastmilk: 1 teaspoon (optional)

METHOD

  1. First, clean and wash apple with water for 2-3 times. Now peel and cut into large size pieces.
  2. Transfer to a bowl. Put pressure cooker on medium flame and pour water. Now put that bowl in cooker and cook till 2-3 whistles.
  3. Turn off the flame and let the steam released itself.
  4. Transfer to a bowl to cool completely. Now make a smooth paste with the help of a blender jar.
  5. For taste, add 1 teaspoon of breastmilk.
  6. Transfer to a bowl.
  7. Puree is ready to give.
Health & Nutrition - Apples
Picture credits: https://www.stemilt.com/farm-to-fork/health-nutrition-apples/

THANKS FOR YOUR TIME READING THIS ARTICLE. SHOW SOME LOVE BY LIKING, SHARING AND FOLLOWING MY BLOG. AND IF YOU THINK THIS ARTICLE CAN BE USEFUL FOR SOMEONE YOU KNOW, PLEASE FEEL FREE TO SHARE ON FACEBOOK, TWITTER, LINKEDIN OR ANYWHERE YOU WANT! 

Oreo Cake!

I have tried this cake on my daughter’s third month birthday!

Cake is in everybody’s favourite dessert list in my opinion, correct me if I am wrong. 🙂 There are so many type of cakes all over the world. I have tried Oreo biscuits cake, which is really tempting. Let’s proceed to the recipe.

INGREDIENTS

Oreo biscuits (chocolate flavour): 20
Mik: 1 cup
Baking powder: 1 tablespoon
Baking soda: 1/2 tablespoon
Almonds: 10 (chopped)
Cashews: 10 (chopped)
Walnuts: 5-6
Dairy milk shots: 8
Dairy milk chocolate bar: 50 grams
Butter: for greasing

METHOD

  1. Take all the oreo biscuits, break into small pieces, and blend them into fine powder. Transfer it to a bowl. Add milk, baking powder, baking soda in it. Mix and make a smooth paste. Add some milk if required.
  2. Now add chopped almonds and cashews. Mix it again. Meanwhile, preheat your microwave oven.
  3. Take cake pan, grease it with butter and transfer cake batter to it. Put the pan into the oven and bake it, you can check your cake before the estimated time by inserting a toothpick in the centre of the cake.
    (I am using whirlpool Magicook delux – W 20 Grill Microwave oven, this is really very helpful for me because it has modes for every type of recipe. Just select the mode start cooking or baking.)
  4. If your toothpick comes out clean, your cake is ready. Now take out the pan from oven and put a plate on it, turn the pan upside down and you will see that the cake is coming out easily on the plate.
  5. Leave it out in the open for 10 minutes to help the cake cool down a little.
  6. After cooling completely it’s time for icing. Melt dairy milk bar in microwave or in hot water (Put dairy milk bar in hot water with wrapper till melting)and spread in on cake. Sprinkle chopped walnuts and decorate cake with dairy milk shots. (you can use any other chocolate)
  7. Oreo Cake is ready!

THANKS FOR YOUR TIME READING THIS ARTICLE. SHOW SOME LOVE BY LIKING, SHARING AND FOLLOWING MY BLOG. AND IF YOU THINK THIS ARTICLE CAN BE USEFUL FOR SOMEONE YOU KNOW, PLEASE FEEL FREE TO SHARE ON FACEBOOK, TWITTER, LINKEDIN OR ANYWHERE YOU WANT! 🙂

Please rate our website(required)

Kairi ka koocha!

Kairi ka koocha is made of raw mangoes. It’s a ready to eat chutney. Raw mango is most common and favourite in India during summers. You can made lot of things with raw mangoes like kairi ki launji, panna, achaar etc. Let’s proceed to the recipe.

KAIRI KI LAUNJI: https://yellowbowlrecipes.com/2019/05/25/kairi-ki-chutney-launji/
PANNA: https://yellowbowlrecipes.com/2019/06/07/kairi-panna/

PREPARATION TIME:15 MINUTES
CUISINE: INDIAN
COURSE: CHUTNEY

INGREDIENTS

Raw mangoes: 2 medium
Mustard oil: 3 teaspoons
Fennel flower seeds (kalonji): 1/2 teaspoon
Carom seeds (ajwain): 1 teaspoon
Red chilli powder: 1/2 teaspoon
Salt: according to your taste

METHOD

  • Wash raw mangoes with water and peel them. With the help of a grater, grate them.
  • Now add mustard oil, fennel flower seeds, carom seeds, red chilli powder, and salt. Mix them well.
  • After mixing, keep it in a glass jar, and put it under sunlight for 3 hours. You can enjoy it immediately. But sunlight helps to improve the taste.
  • Kairi ka koocha is ready.
  • Now you can have it with paratha or roti.

THANKS FOR YOUR TIME READING THIS ARTICLE. SHOW SOME LOVE BY LIKING, SHARING AND FOLLOWING MY BLOG. AND IF YOU THINK THIS ARTICLE CAN BE USEFUL FOR SOMEONE YOU KNOW, PLEASE FEEL FREE TO SHARE ON FACEBOOK, TWITTER, LINKEDIN OR ANYWHERE YOU WANT! 🙂